Overview
ChrisslyEngine is a 3D-Rendering/Audio Engine for the Playstation Portable (PSP), Android devices and Windows written in C++.
Screenshots
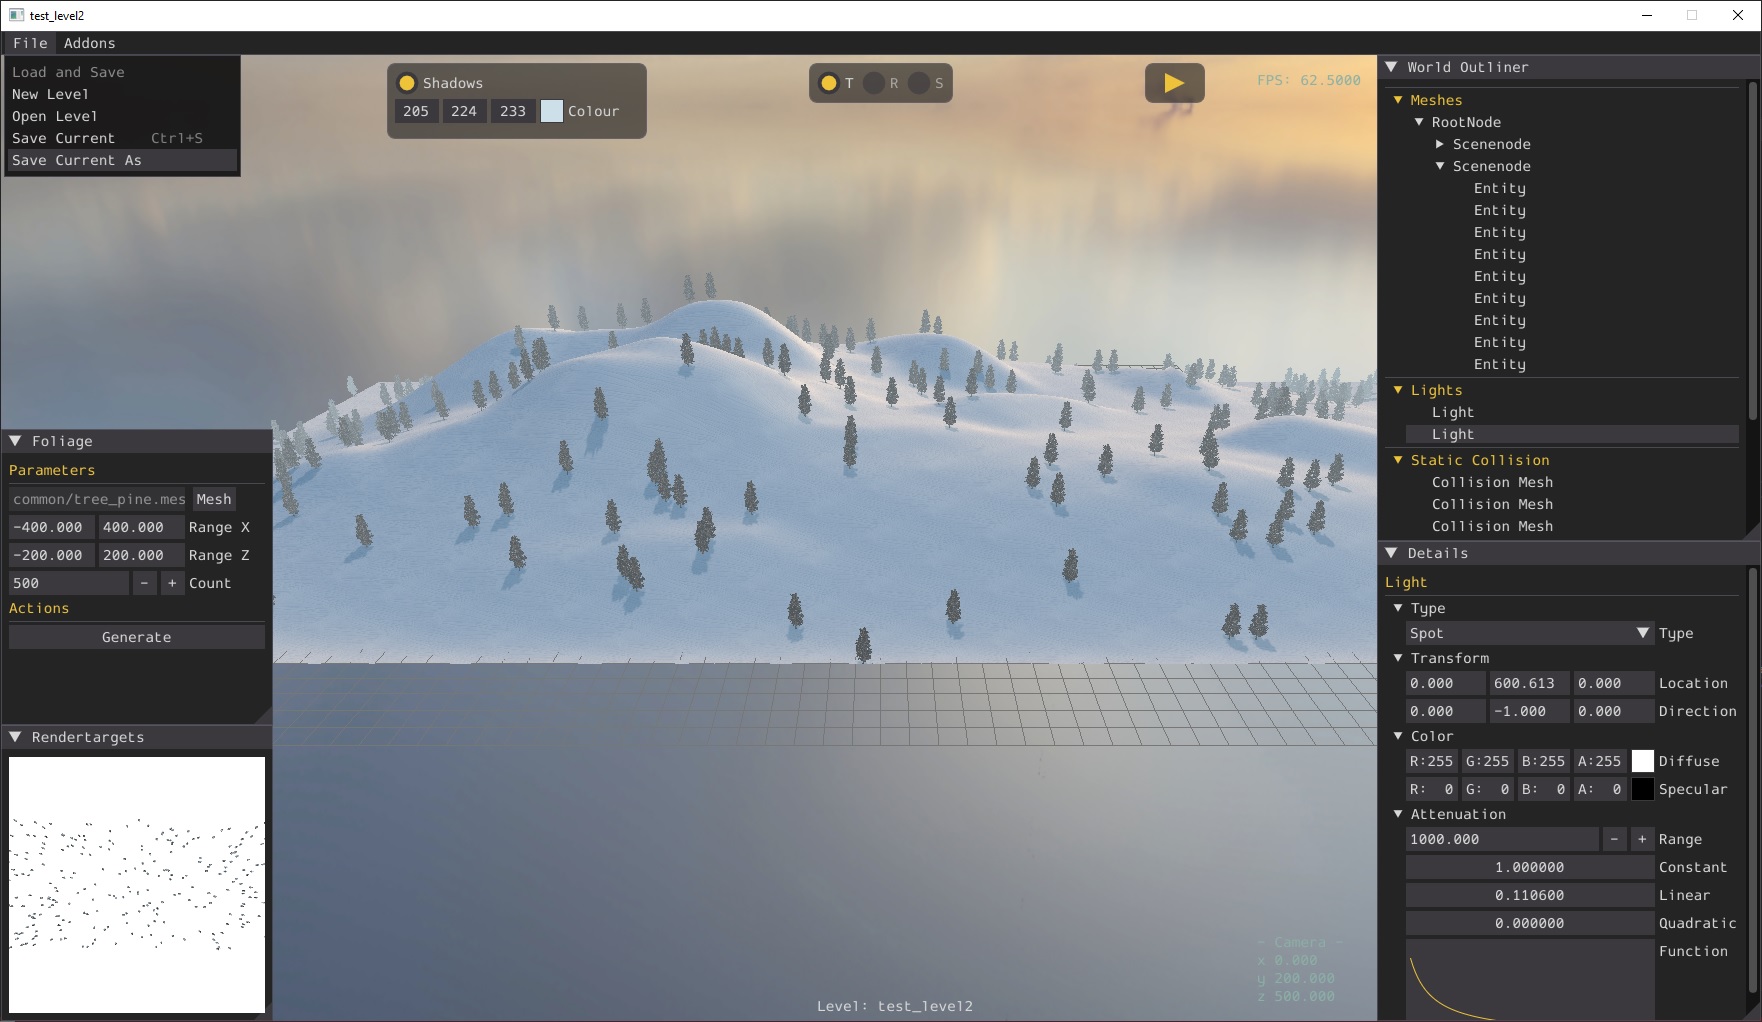
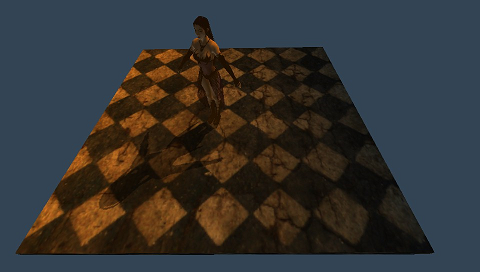
Windows
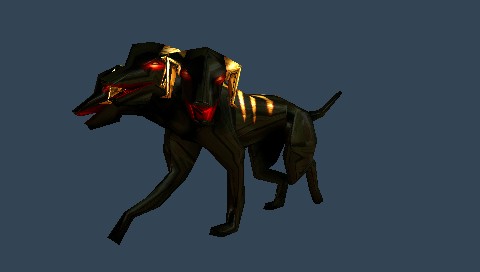
Playstation Portable
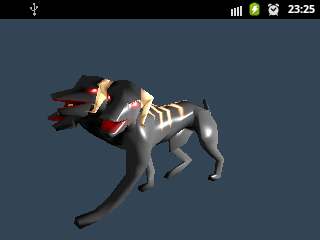
Android
Features
Platform Support
- Playstation Portable (PSP)
- Android
- Windows
Audio
- channel management
- buffered and streamed playback
- 3d sound (built-in software implementation wich works with all devices/drivers that support at least stereo output, linear clamped roll-off)
- File Format Support
- RIFF WAVE (*.wav)
- Ogg Vorbis (*.ogg)
- real-time dsp system
- built-in reverb (using verblib)
Graphics
- Materials
- C-like syntax material description language that exposes common fixed function operations with support for multi-pass rendering
- Shader parameters can be modified in the application using a simple highlevel interface
- Animation
- Skeletal animation with support for weighted/additive blending of multiple animations and partial animation
- Morph animation (linear blends between shape snapshots)
- Texture-based shadows (WIP)
- Cubemaps
- MSAA and alpha to coverage
- Normalmaps (WIP)
Tools
- Blender Add-on
- Export to ChrisslyEngine-Mesh (.mesh), ChrisslyEngine-Texture (.tex), ChrisslyEngine-Materialdescription (.material) and ChrisslyEngine-Skeleton (.skeleton) directly from Blender
- Command line tools
- meshtool: Converts Wavefront-ASCII-OBJ (.obj) to ChrisslyEngine-Mesh (.mesh), creating a morphanimation from a series of (*.obj) files is also supported
- texturetool: Adds ChrisslyEngine texture header to raw texture data
Quickstart
Download
Download repository as zip here or clone it with the following command:
git clone https://github.com/the-real-evolver/chrisslyengine.git
Building, and running the windows sample
Building the sample
- install Visual Studio 2019 or higher
- open 'windows/ChrisslyEngine_Windows.sln', right click 'ChrisslyEngine_Windows' in the project explorer and click 'Build'
- run 'windows/exportassets.cmd'
Running the sample
- press 'F5' in Visual Studio to start/debug the sample application
Building, and running the psp sample
Building the sample
- install devkitPSP
- open a commandline, goto 'chrisslyengine\psp' and run 'make' or open 'ChrisslyEngine_PSP.pnproj' and press 'Alt + 1'
- run 'psp\exportassets.cmd'
Running the sample on a real PSP
- create a new folder 'ms0:/PSP/GAME/ChrisslyEngine_PSP'
- copy the 'export' folder and the 'EBOOT.PBP' to the new folder
- use Half-Byte Loader to execute, since the PBP is not signed
Running the sample on the JPCSP emulator
- copy the 'export' folder to 'jpcsp\ms0\PSP\GAME\ChrisslyEngine_PSP'
- open JPCSP, then load the EBOOT.PBP with 'Load File' and press 'Run'
Running the sample on the PPSSPP emulator
- copy the 'export' folder to 'ppsspp_win\memstick\PSP\GAME\ChrisslyEngine_PSP'
- open PPSSPP, then load the EBOOT.PBP with 'File' -> 'Open'
Building, and running the android sample
Building the sample
- install Android Studio Giraffe | 2022.3.1 or higher
- open project 'chrisslyengine/android' in Android Studio
- press 'Ctrl + F9' to build the application
- run 'exportassets.cmd'
Running the sample with Android Studio
- press 'Shift + F10' in Android Studio to start the sample application
Toolchain
Internal and external tools used for working with the engine.
Blender
Install Addon
- copy 'tools/blender/io_export_chrisslymesh.py' to 'C:\Program Files\Blender Foundation\Blender 3.1\3.1\scripts\addons'
- in Blender go to 'Edit -> Preferences -> Add-ons' and check 'Import-Export ChrisslyEngine-Mesh format(.mesh)'
Export directly to (.mesh), (.material), (.skeleton) and (.tex) using the addon
- textures are exported in R8G8B8A8 format
- axis_conversion(from_forward='-Y', to_forward='Z', to_up='Y') on static meshes and morph animations, but not on skeletal animations
- modifiers are not applied (to apply: 'Object Mode -> Object -> Apply -> All Transforms')
- set a custom gpu program in material:
- select material
- 'Custom Properties -> New'
- name the new property 'gpu_program' and select 'String' as type
- set value (like "skybox.fx")
- after export your (.material) file will contain a line 'gpu_program "skybox.fx"' in the pass section
- add a custom/external cubemap to material:
- select material
- 'Custom Properties -> New'
- name the new property 'cubic_texture' and select 'String' as type
- set value (like "irradiance.tex")
- after export your (.material) file will contain another texture_unit with the given cubemap in the pass section
Export to "obj" for later conversion with the mesh cl tool
Options blender "obj" exporter for animations:
- 'Export Animation'
- 'Triangulated Mesh'
Skeletal Animation Setup
In order to work correctly in the engine there are a few necessities when setting up the rig and animations:
- limit weights per vertex to 4 (in 'Weight Paint' mode: 'Weights -> Limit Total')
- normalise weights so all weights of a vertex sum up to 1 (in 'Weight Paint' mode: 'Weights -> Normalize All')
- in 'Pose Mode' set the bones transform mode to: 'Quaternion (WXYZ)'
- apply transform if the mesh or skeleton was moved, rotated or scaled
- always insert 'Location & Rotation' to
allchannels (scale not supported) - to add an animation just create a new Action
About Coordinate Systems
Blender (forward is -Y and Up is +Z)
+Z
^    +Y
|   /
|  /
| /
|/
+--------> +X
OpenGL Right-handed (forward is +Z and Up is +Y)
+Y
^    -Z
|   /
|  /
| /
|/
+--------> +X
That's why the exporter transforms the vertices with axis_conversion(from_forward='-Y', to_forward='Z', to_up='Y').
Separate mesh into equal chunks by a grid
This comes in handy to split large meshes like terrains in to smaller pieces for culling and coarse collision detection.
- 'Object Mode -> Add -> Mesh -> Grid'
- delete faces of the grid 'Edit Mode -> Mesh -> Delete -> Only Faces'
- in 'Edge Select' mode, extrude grid with 'E' in -Z direction to create a shape we can cookie-cut our mesh with
- 'Object Mode' select all (the mesh and the grid) and press 'Ctrl + J' to join
- 'Edit Mode' select corner of the grid and press 'L'
- 'Face -> Intersect(Knife)'
- 'Mesh -> Split -> Faces by Edges'
- 'Mesh -> Separate -> By Loose Parts' will create separate objects
- remove leftovers from the grid
- in the exporter check the 'Objects as separate files' option
Flat normals (face normal on all vertices of the face)
For the entire mesh:
- 'Edit Mode' select all
- 'Add Modifier -> Edge Split'
- 'Object Mode' select modifier and 'Apply' For particular faces:
- 'Edit Mode' select face
- 'Mesh -> Split -> Selection'
Gimp
Add alpha channel
- 'Colours -> Colour to Alpha...'
Extract alpha to single png (useful when using a separate compressed texture for the alpha channel on android)
- 'Colours -> Components -> Decompose...' ('RGBA', uncheck 'Decompose to Layers...')
- right click on image and 'Export As...'
Add greyscale image as an alpha channel to image
- Add an alpha channel to the image you want to mask 'Layer -> Transparency -> Add Alpha Channel'
- Right click the image layer in the layers panel, and click 'Add Layer Mask...'. The fill you choose for the mask doesn't matter at this stage - white or black will do.
- Open the other image you want to use as a mask, and select all 'Ctrl + A', and copy it, 'Ctrl + C'
- Back in the other image, select the layer mask thumbnail by clicking on it in the layers panel
- Paste the mask you copied earlier 'Ctrl + V'
- Hit the anchor icon or 'Ctrl + H', to anchor the floating selection to the layer mask.
RAWTex Gimp Plugin
Install
- get plugin here
- copy 'RAWTex.exe' to 'C:\Users\username\AppData\Roaming\GIMP\2.10\plug-ins'
Usage
- 'File -> Export As...'
- 'Select File Type (By Extension) -> RAW Texture'
- 'Save'
- choose options and 'OK'
Windows
- don't mirror image vertical (except for DXT1-5, the plugin mirrors the texture when exporting to Standard OpenGL)
- DXT Format: Standard OpenGL (otherwise colors are scrambled)
PSP
- mirror image vertical (Paint)
- DXT Format: PSP
cmftStudio
With this tool you can create cubemaps from HDRIs and export the faces as separate textures. It also allows creating of irradiance maps.
Install
- get it here
Usage
To store the the faces as separate files:
- File type: '.tga'
- Output type: 'Facelist'
Then load the faces in to Gimp, export them with the RAWTex plugin and convert them to a .tex with the command line texturetool. Also keep in mind naming convention for the cubemap faces.
Command line tools
Texturetool
Usage
Android
How to use etc1tool to export compressed textures
Export with pkm header and pass '-pkm' to hint texturetool to parse properties from pkm header:
etc1tool.exe mage.png
texturetool.exe -pkm -data mage.pkm -out mage_etc1.tex
Or only export payload using '--encodeNoHeader' and explicitly pass properties:
etc1tool.exe mage.png --encodeNoHeader
texturetool.exe -format PF_ETC1_RGB8 -width 256 -height 256 -data mage_etc1.raw -out mage_etc1.tex
Meshtool
Usage
Export morph animations example
meshtool.exe -morphanim -length 3.0 -numKeys 31 -src %SrcFolder%\cerberus\cerberus_walk -dst %DstFolder%\cerberus_walk.mesh
For the call above the following filestructure is expected (this is how Blender's obj exporter outputs animations):
+-- cerberus
|   +-- cerberus_walk1.obj    <- starts with index 1 !
|   +-- cerberus_walk2.obj
|   +-- ...
|   +-- cerberus_walk31.obj
Leveleditor (WIP)
 Comming soon!
Prerequisites
The first thing to do is to create a folder named 'export' in your project directory. This is the root directory for your assets. If you export a mesh from Blender the addon exports all filepaths (for example a .tex file referenced in a .material file) relative to the 'export' folder.
Exporting assets from Blender
In Blender go to 'File -> Export -> ChrisslyEngine-Mesh (.mesh)'. Select the 'export' folder (or any subfolder of it), check any options you wish, and click 'Export ChrisslyEngine-Mesh'.
Creating a level
Go to 'File -> New Level'.
Adding entities
Right click a SceneNode in the World Outliner and choose 'Add Entity'. This opens the asset root directory ('export'). Double click the .mesh file you want load or select it and click 'OK'. Press 'F' to focus the entity.
Adding lights
Right click 'Lights' in the World Outliner and choose 'Create Light'.
Adding collision geometry
Right click 'Static Collision' in the World Outliner and choose 'Add Collision Mesh'.
Create collision geometry from entity
Right click on an Entiy in the World Outliner and choose 'Export Collision'. This will create collision geometry from the mesh the entity is based on, considering the transformation by the scenenode it is attached to.
Keyboard Shortcuts
| Shortcut | Action |
|---|---|
| Del | delete selected Entity, Scenenode, Light or Collision Mesh |
| LCtrl + S | save current level |
| F | focus camera on selected object in the World Outliner |
| LCtrl + Z | undo the last Scenenode transformation |
| RAlt + P | play |
Gamepad Shortcuts
| Button | Action |
|---|---|
| Start | play |
Level-Format
world_settings
{
    shadow_technique none|texture
    shadow_colour "0xe9e0cd"
}

materials
{
    "dir/name.material"
    "dir/another.material"
    ...
}

node // this is the root node "current_level"
{
    position <x y z>
    orientation <x y z w>
    scale <x y z>
    entity
    {
        mesh "dir/name.mesh"
        cast_shadows true|false
        receives_shadows true|false
        cull_frustum true|false
        animation "AnimationName"
        {
            enable true|false
            loop true|false
            weight <f>
        }
        animation "AnotherAnimation"
        {
            ...
        }
    }
    entity
    {
        ...
    }
    node
    {
        ...
    }
}

light
{
    type point|directional|spot
    position <x y z>
    direction <x y z>
    diffuse "0xffffffff"
    specular "0x0"
    attenuation <range constant linear quadradic>
    cast_shadows true|false
    shadow_distance <distance>
}

collision
{
    terrain|levitating|misc "dir/name.mesh"
}

game
{
    spawn_point <x y z>
    spawn_velocity <x y z>
    hero_light_cast_shadows true|false
    world_bounds <min_x min_y min_z max_x max_y max_z>
}
Engine
The engine consists of the following subsystems:
- Core
- Graphics
- Audio
- Input
- Application
Graphics
The subsystem responsible for rendering and animation.
Mesh-Format
Tag                         Bytes       Type
M_MESH_BOUNDS               1           unsigned char
  bounding-center           12          float
  bounding-radius           4           float

M_SUBMESH                   1           unsigned char
  materialname-length       1           unsigned char
  materialname-data         1 - 255     char
  vertex-count              4           unsigned int
  bytes-per-vertex          4           unsigned int
  bone-weights              16 - 32     float           // only skeletal animation (psp can have up to eight weights)
  bone-indices              16          unsigned int    // only skeletal animation (d3d11 and gles2 rendersystem)
  texture-coordinates       8           float
  color                     4           int
  normal                    12          float
  postition                 12          float

M_ANIMATION                 1           unsigned char
  anim-length               4           float

M_ANIMATION_TRACK           1           unsigned char
  handle(submesh-index)     1           unsigned char

M_ANIMATION_MORPH_KEYFRAME  1           unsigned char
  key-timestamp             4           float
  vertex-count              4           unsigned int
  bytes-per-vertex          4           unsigned int
  texture-coordinates       8           float
  color                     4           int
  normal                    12          float
  postition                 12          float

M_MESH_SKELETON_FILE        1           unsigned char
  skeletonfilepath-length   1           unsigned char
  skeletonfilepath-data     1 - 255     char
Material-Format
material "name"
{
    pass
    {
        fog_override false
        fog_override true <red green blue start end>

        lighting on|off
        emissive vertexcolour
        emissive <red green blue alpha>
        ambient vertexcolour
        ambient <red green blue alpha>
        diffuse vertexcolour
        diffuse <red green blue alpha>
        specular vertexcolour
        specular <red green blue alpha shininess>

        scene_blend one|zero|dest_colour|src_colour|one_minus_dest_colour|one_minus_src_colour|dest_alpha|src_alpha|one_minus_dest_alpha|one_minus_src_alpha
                    one|zero|dest_colour|src_colour|one_minus_dest_colour|one_minus_src_colour|dest_alpha|src_alpha|one_minus_dest_alpha|one_minus_src_alpha
        scene_blend fix fix <red green blue> <red green blue>

        alpha_test never|less|equal|less_equal|greater|not_equal|greater_equal|always <alpha>
        alpha_to_coverage on|off

        cull_hardware none|clockwise|anticlockwise

        depth_check on|off
        depth_write on|off

        texture_unit
        {
            texture "filename.tex"
            cubic_texture "basefilename.tex" // you'll have to provide the following 6 files: "basefilename_px.tex" "basefilename_nx.tex" "basefilename_py.tex" "basefilename_ny.tex" "basefilename_pz.tex" "basefilename_nz.tex"

            colour_op replace|modulate|add|alpha_blend|decal alpha|colour

            filtering none|point|linear none|point|linear none|point|linear

            scroll <u v>
            scale <u v>

            env_map spherical
        }

        gpu_program "gpuprogramname"
    }
}
Texture-Format
A texture file contains a header (see below) followed by the payload.
Tag             Bytes       Type
format          1           unsigned char
width           2           unsigned short
height          2           unsigned short
num-mipmaps     1           unsigned char
swizzled        1           unsigned char
Skeleton-Animation-Format
skeleton
{
    num_bones <n>
    bone "Bonename"
    {
        index <i>
        parent <p>
        local_matrix <m00 m01 m02 m03 m10 m11 m12 m13 m20 m21 m22 m23 m30 m31 m32 m33>
        inv_model_matrix <m00 m01 m02 m03 m10 m11 m12 m13 m20 m21 m22 m23 m30 m31 m32 m33>
    }
    bone "AnotherBone"
    {
        ...
    }
}

animation "Animationname"
{
    length <l>
    num_keyframes <n>
    track "Trackname"
    {
        index <i>
        key
        {
            time <t>
            local_matrix <m00 m01 m02 m03 m10 m11 m12 m13 m20 m21 m22 m23 m30 m31 m32 m33>
        }
        key
        {
            ...
        }
    }
    track "AnotherTrack"
    {
        ...
    }
}
animation "AnotherAnimation"
{
    ...
}
Animation System Gotchas
- general
- a mesh can have either morph or skeletal animation, but not both
- only one morphanimation (with hardcoded name "default", get with: entity->GetAnimationState("default")) per mesh, blending multiple morphanimations is not supported
- bone rotations are blended as follows:
Quaternion q1 = Quaternion::Nlerp(Quaternion::IDENTITY, rotation1, weight1);
Quaternion q2 = Quaternion::Nlerp(Quaternion::IDENTITY, rotation2, weight2);
Quaternion blendedQ = q1 * q2;
- d3d11 and gles2 rendersystem
- maximum number of bones per skeleton: 40
- uses indexed vertex blending
- psp rendersystem
- maximum number of bones per skeleton: 8 (limited by the hardware)
- no indexed vertex blending (not supported by the hardware)
Shadows
Texture-based shadows current limitations
- general
- only a single light can cast shadows
- d3d11 rendersystem
- skeletal or morph animated entities can cast but not receive shadows
- shadowmap resolution: 1024x1024
- psp rendersystem
- shadowmap resolution: 256x256
- gles2 rendersystem
- skeletal animated entities can cast but not receive shadows
- morph animated entities can neither cast nor receive shadows
- shadowmap resolution: 256x256
Built-in Default Shaders
Light attenuation:
Formula: attenuation = 1.0f / (constant + linear * distance + quadratic * distance²)
Auto updated shader parameters:
"worldMatrix"
"viewMatrix"
"projectionMatrix"
"worldViewProjMatrix"
"textureMatrix"
"boneMatrices"
"morphWeight"
Default light params matrix:
[ posx    posy    posz        -           ] position
[ diff.r  diff.g  diff.b      -           ] diffuse
[ spec.r  spec.g  spec.b      shininess   ] spec
[ const   linear  quadratic   range       ] attenuation
Cubemaps
Naming convention for the files:
cubemap_px.tex
cubemap_nx.tex
cubemap_py.tex
cubemap_ny.tex
cubemap_pz.tex
cubemap_nz.tex
Load cubemap:
Texture* cubeMap = TextureManager::Instance()->Load("cubemap.tex", TEX_TYPE_CUBE_MAP);
Partial animation with blend masks
It may be necessary to have more refined control over animation blends, instead of just blending all bones at once. This can be achieved with a 'blend mask' wich allows you to set the blend weight for each bone individually. A typical use-case for using 'blend masks' is to exclude lower-body bones so that animation plays only on the upper-body, regardless of the full-body state.
Example
We have two animations: "running" and "shooting". If we want to shoot while running we have to disable (set weight to zero) the lower-body bones for the "shooting" animation and the upper-body bones for the "running" animtion. Assuming the skeleton has 40 bones and the bones 0-31 represent the upper-body and the bones 32-39 the lower-body the blend masks are setup as follows:
AnimationState* running = entity->GetAnimationState("running");
running->CreateBlendMask(40U);
for (int i = 0; i < 32; ++i)
{
    running->SetBlendMaskEntry(i, 0.0f);
}

AnimationState* shooting = entity->GetAnimationState("shooting");
shooting->CreateBlendMask(40U);
for (int i = 32; i < 40; ++i)
{
    shooting->SetBlendMaskEntry(i, 0.0f);
}
Note that the weights in the blend mask are absolute and they are not modulated with the averaged weight of the animation state. You have to prevent 'overshooting' (weights > 1.0f) yourself, when blending multiple animations. For the example above this would require that for every body-part (upper-body, lower-body etc.) you have to loop through all the animation states affecting that part, sum up their weights, calculate the weight factor '1.0f / summed_weights' and then apply this factor to all weights in the blendmask.
Create mesh programmatically
chrissly::graphics::Vertex vtxData[3U] =
{
    {0.0f, 0.0f, 0xffffffff, 0.0f, 0.0f, 1.0f, -0.5f , -0.5f, 0.0f},
    {0.0f, 0.0f, 0xffffffff, 0.0f, 0.0f, 1.0f,  0.5f , -0.5f, 0.0f},
    {0.0f, 0.0f, 0xffffffff, 0.0f, 0.0f, 1.0f,  0.0f ,  0.5f, 0.0f}
};
HardwareVertexBuffer* vertexBuffer = CE_NEW HardwareVertexBuffer(3U, 36U, HBU_STATIC, false);
void* buffer = vertexBuffer->Map();
memcpy(buffer, vtxData, sizeof(vtxData));
vertexBuffer->Unmap();
Mesh* mesh = MeshManager::Instance()->CreateManual("mytrianglemesh");
SubMesh* subMesh = mesh->CreateSubMesh();
subMesh->vertexBuffer = vertexBuffer;
subMesh->SetMaterialName("green_material");
subMesh->topology = PT_TRIANGLELIST;
Entity* entity = SceneManager::Instance()->CreateEntity("mytrianglemesh");
sceneNode->AttachObject(entity);
Rendering a full-screen triangle for post-processing
In this example we change the colours of the rendered scene to grayscale. First we need a shader that samples a texture and convert the pixel's colour to a grayscale value:
const char* const PostFxGpuProgram =
"Texture2D texture0 : register(t0);\n"
"SamplerState samplerLinear : register(s0);\n"
"struct VertexIn\n"
"{\n"
"    float2 uv : TEXCOORD0;\n"
"    float3 normal : NORMAL0;\n"
"    float3 position : POSITION0;\n"
"    float4 colour : COLOR0;\n"
"};\n"
"struct VertexOut\n"
"{\n"
"    float2 uv : TEXCOORD;\n"
"    float4 position : SV_Position;\n"
"    float4 colour : COLOR;\n"
"};\n"
"void DefaultVertexShader(VertexIn input, out VertexOut output)\n"
"{\n"
"    output.uv = input.uv;\n"
"    output.position = float4(input.position, 1.0f);\n"
"    output.colour = input.colour;\n"
"}\n"
"void DefaultFragmentShader(VertexOut input, out float4 output : SV_Target)\n"
"{\n"
"    float4 colour = texture0.Sample(samplerLinear, float2(input.uv.x, 1.0f - input.uv.y));\n"
"    float grey = 0.299f * colour.r + 0.587f * colour.g + 0.114f * colour.b;\n"
"    output = float4(grey, grey, grey, 1.0f);\n"
"};\n";
Next we setup the texture we going to render our scene to:
RenderTexture* scene_rt = new RenderTexture();
scene_rt->Create(window->GetWidth(), window->GetHeight(), PF_FLOAT32_RGBA, true);
Viewport* vp = scene_rt->AddViewport(camera, 0, 0, window->GetWidth(), window->GetHeight());
vp->SetBackgroundColour(0xff242424);
Then we'll have to create the pass (material) the full-screen triangle is rendered with:
Pass* postfx_pass = new Pass(0U);
TextureUnitState* tus = postfx_pass->CreateTextureUnitState();
Texture* rt_texture = new Texture(scene_rt);
tus->SetTexture(rt_texture);
GpuProgram* postfx_gpu_program = GpuProgramManager::Instance()->LoadFromSource("postfx.fx", PostFxGpuProgram, "DefaultVertexShader", "DefaultFragmentShader");
postfx_pass->SetGpuProgram(postfx_gpu_program);
The last step of the initialisation is to create the triangle mesh:
chrissly::graphics::Vertex vtx_data[3U] =
{
    {0.0f, 0.0f, 0xffffffff, 0.0f, 0.0f, 1.0f, -1.0f , -1.0f, 0.0f},
    {2.0f, 0.0f, 0xffffffff, 0.0f, 0.0f, 1.0f,  3.0f , -1.0f, 0.0f},
    {0.0f, 2.0f, 0xffffffff, 0.0f, 0.0f, 1.0f,  -1.0f,  3.0f, 0.0f}
};
HardwareVertexBuffer* vertex_buffer = CE_NEW HardwareVertexBuffer(3U, 36U, HBU_STATIC, false);
void* buffer = vertex_buffer->Map();
memcpy(buffer, vtx_data, sizeof(vtx_data));
vertex_buffer->Unmap();
Mesh* mesh = MeshManager::Instance()->CreateManual("fs_triangle_mesh");
SubMesh* sub_mesh = mesh->CreateSubMesh();
subMesh->vertexBuffer = vertex_buffer;
sub_mesh->topology = PT_TRIANGLELIST;
Entity* fs_triangle = SceneManager::Instance()->CreateEntity("fs_triangle_mesh");
In our renderloop GraphicsSystem::RenderOneFrame() will be replaced with the following code:
// render scene to texture
scene_rt->Update();
// switch to main render window
RenderSystem::Instance()->SetRenderTarget(window);
RenderSystem::Instance()->SetViewport(window->GetViewport(0U));
// set pass that applies posteffect and render full-screen triangle
RenderSystem::Instance()->SetPass(postfx_pass);
RenderSystem::Instance()->Render(fs_triangle->GetSubEntity(0U));
window->UpdateFrameTime();
window->SwapBuffers();
// manually raise frame number to update animations
GraphicsSystem::Instance()->RaiseFrameNumber();